When you are needing beans for a meal and you don't have time to cook them, learning how to pressure can dry beans is a great way to always have canned beans on hand. I prefer to store beans in their dry state, because they can be stored for a long time this way. I also love to can dry beans for those times that I need beans fast, and cooking dry beans is not a fast process.
Canning your own beans is also cheaper than purchasing canned beans from the grocery store. I am all for saving money any chance I can. I like to use canned beans mostly for lunches, when I am wanting something quick to serve. I also will use them to add into certain dishes, like enchiladas, to stretch the filling.
Table of contents
I prefer this method of canning dry beans versus the "soaking" method. Simply because it is less time consuming and can be done without prepping the night before. I also don't find the need to soak them beforehand (which is typically done to soften the beans) because they are going to be fully cooked when pressure canned.
You might also like this How To Pressure Can Chicken Stock post.
My Latest Video
Equipment Needed
It is important to have all of your equipment cleaned and ready to go when you are canning. Having everything together will make the canning process run smoother.
- Pressure Canner
- Jars - Pint or quart jars that have been thoroughly washed in hot, soapy water. Because you are using a pressure canner, you do not need to sterilize the jars first.
- Canning Funnel
- Canning Jar Lifter
- De-Bubbler - You can purchase one or use something you have on hand. I've seen people use chopsticks or wooden spoons to de-bubble. De-bubbling removes the trapped air from the jar before placing the lid on.
- Measuring Cups
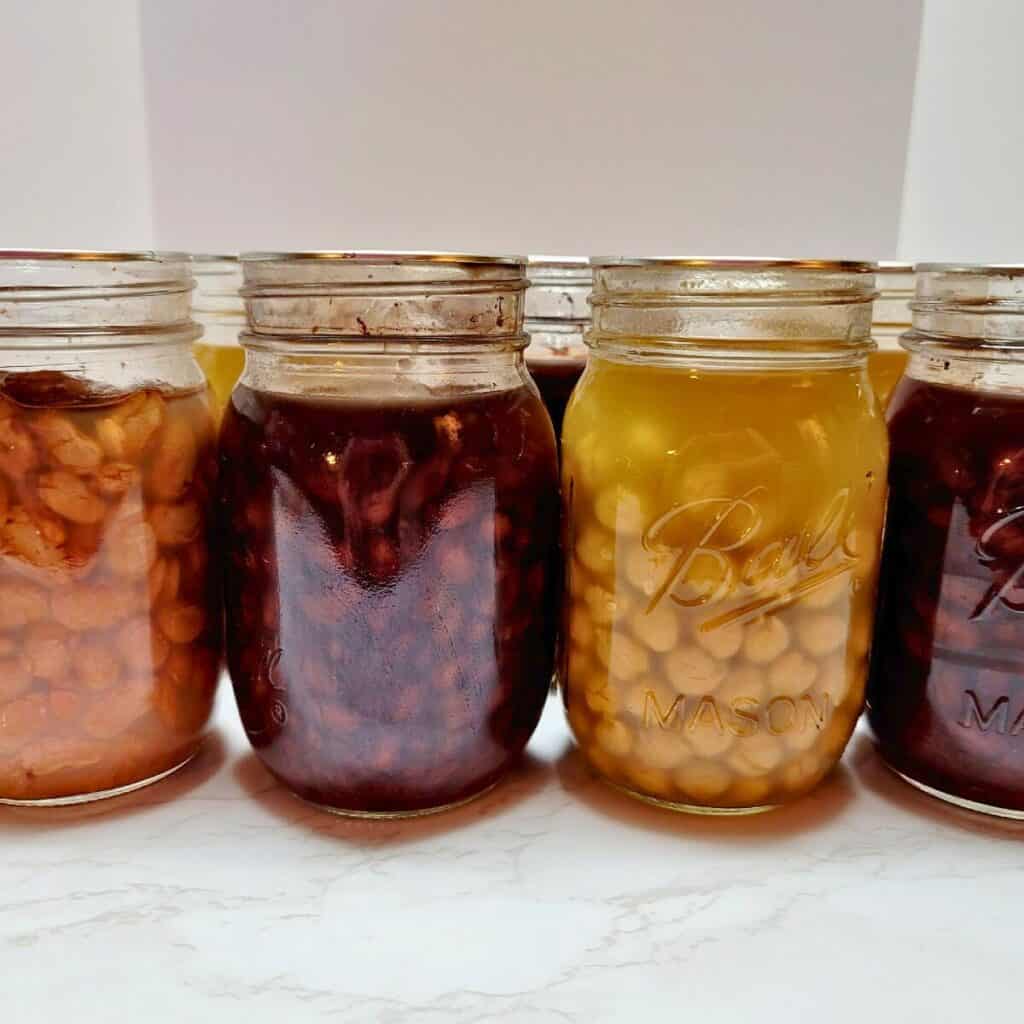
- Dry Beans - Rinsed and sorted. Use ½ cup of beans per pint jar and 1 cup per quart jar.
- Hot Water
- Vinegar - Used to clean the rims of the jars to ensure the lids seal properly. It can also be added to the canner water to help prevent the white haze that hard water can leave on jars.
- Any seasonings that you want to add to your beans. Salt and other seasonings can be added directly to the jars.
How To Pressure Can Dry Beans
It is important to refer to your user guide to know how many jars (and size) you can fit in your canner at one time. In my Presto 23 Quart Pressure Canner I can safely fit 16-pint jars when using a rack to stack jars. So, 8 on the bottom, the rack and 8 more jars stacked on top of the rack. This recipe is for 4 lbs. of dry beans.


- Heat a large pot of water and keep it hot until needed.
- Measure out ½ cup of dry (rinsed and sorted) beans for each pint jar, 16 total. Use 1 cup for quart jars.
- Add seasonings if you like. Salt, garlic, cumin, and other spices can be added directly to the jars.
- Ladle in hot water, filling each jar to 1 inch headspace.
- De-bubble the jars by placing the de-bubbler in the center of the jar and swirling it around a few times to release any trapped air. Top off the jars if needed to return to 1 inch headspace.
- Wipe the rim of each jar with a vinegar-soaked towel to remove anything that might prevent the lid from sealing properly.
- Place a new lid and a ring on each jar and tighten to fingertip tight.
- Place jars in the pressure canner and fill with 3 quarts of water if using a Presto canner. If you are using a different model, check your user guide for the correct amount of water. Place the lid on, lock it into place, and set the heat to high.
- Once the pressure canner starts to vent a steady stream of steam, allow it to vent for 10 minutes before placing the pressure regulator on. After venting, place the regulator and allow the canner to come up to 10 pounds of pressure. Check your user guide for altitude-specific pressure adjustments.
- Set a timer for 75 minutes for pint jars or 90 minutes for quart jars. Adjust the heat as needed to maintain pressure.
- Once the time is up, turn the heat off and allow the pressure to drop to zero before removing the pressure regulator and the lid. Allow the jars to sit in the canner for 5 minutes before carefully removing them with the canning jar lifter. Place on a towel in an area that they will not be bothered. Allow them to rest for 12 hours before removing the rings and checking the seals.
💭 Quick Tip
It is important to note that dry beans MUST be pressure canned. You cannot water bath can dry beans. I use a Presto 23 Quart Pressure Canner that I absolutely love. I have been using this pressure canner for a handful of years now and have had such a great experience with it. When pressure canning, always make sure you read the user guide that came with your pressure canner. Get familiar with how it works and keep your user guide handy to reference back to when needed.
Recipes That Use Beans
FOLLOW ME on Facebook, Pinterest, and YouTube to stay connected!
If you found this How To Pressure Can Dry Beans post helpful, please leave a 🌟star rating and let me know how it went in the comments below!


Comments
No Comments