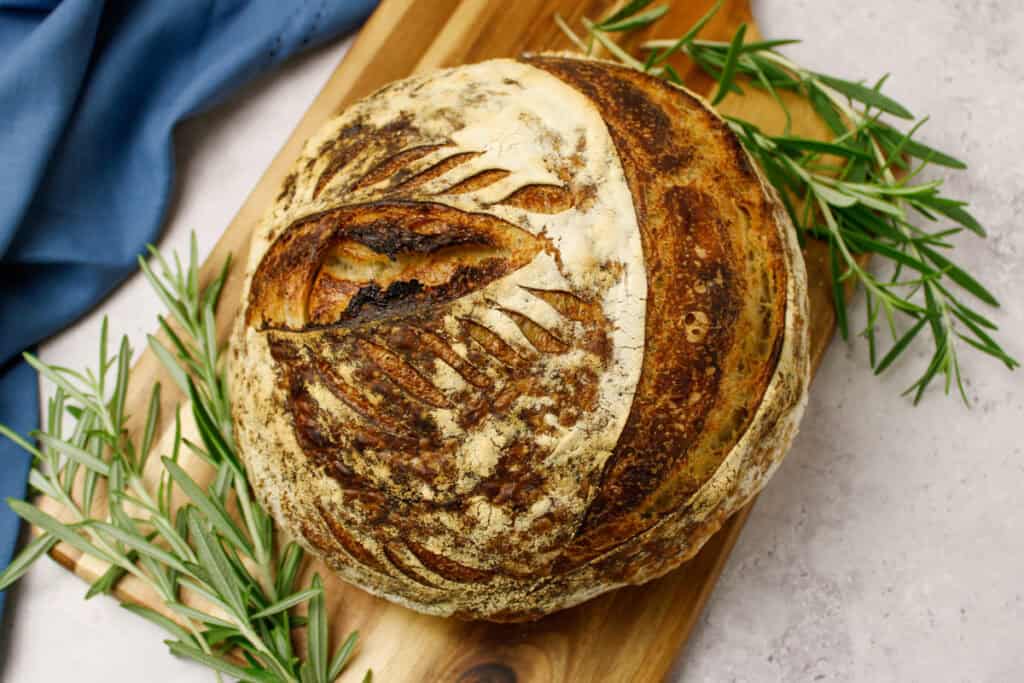
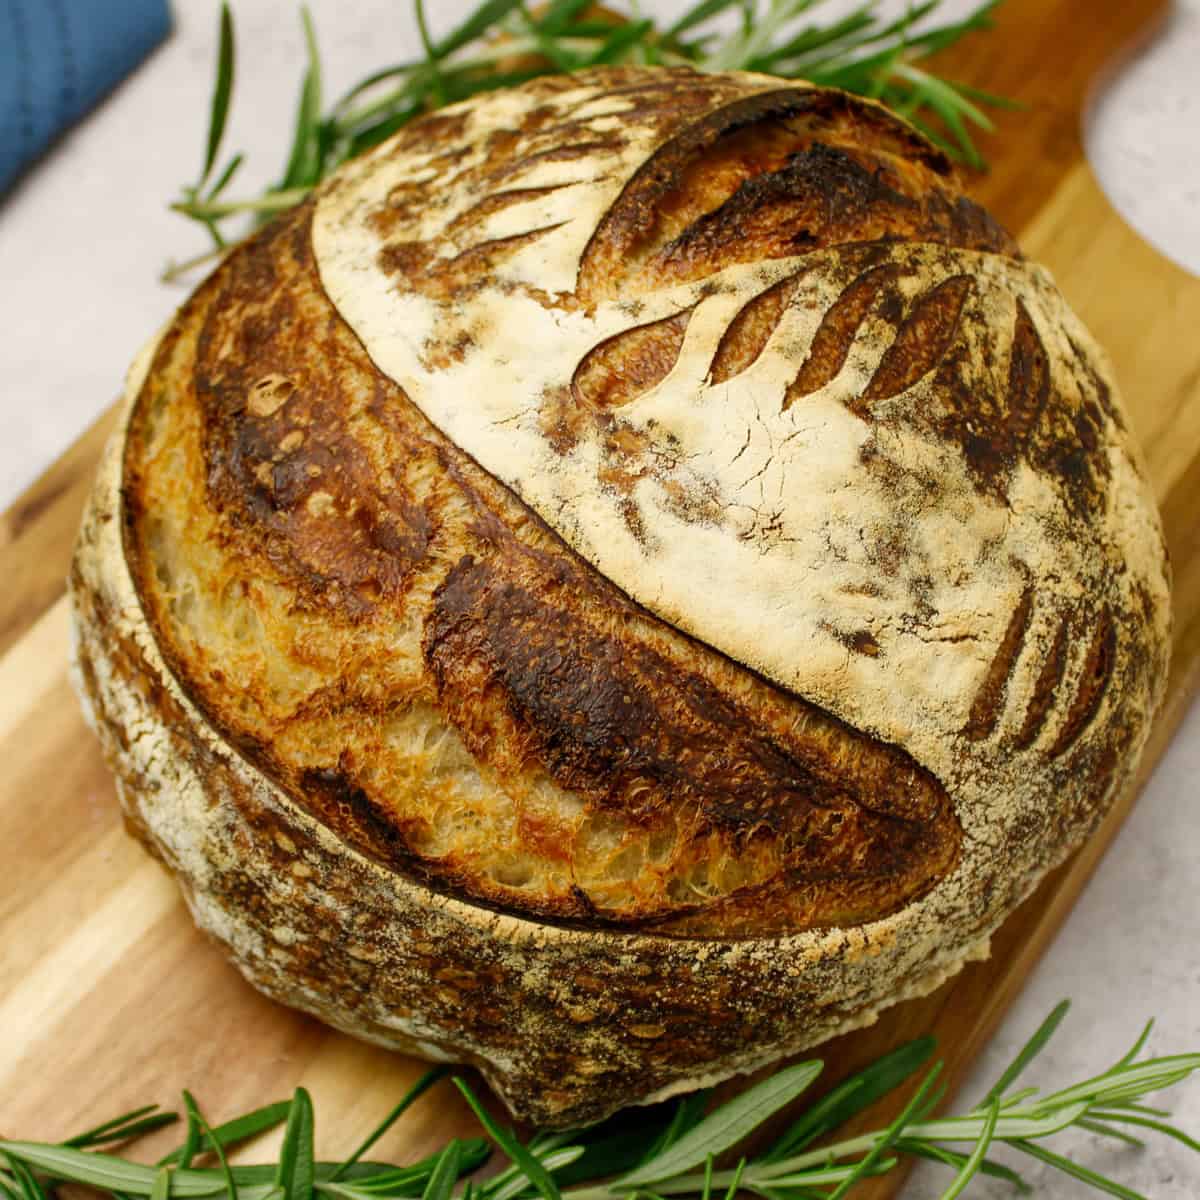
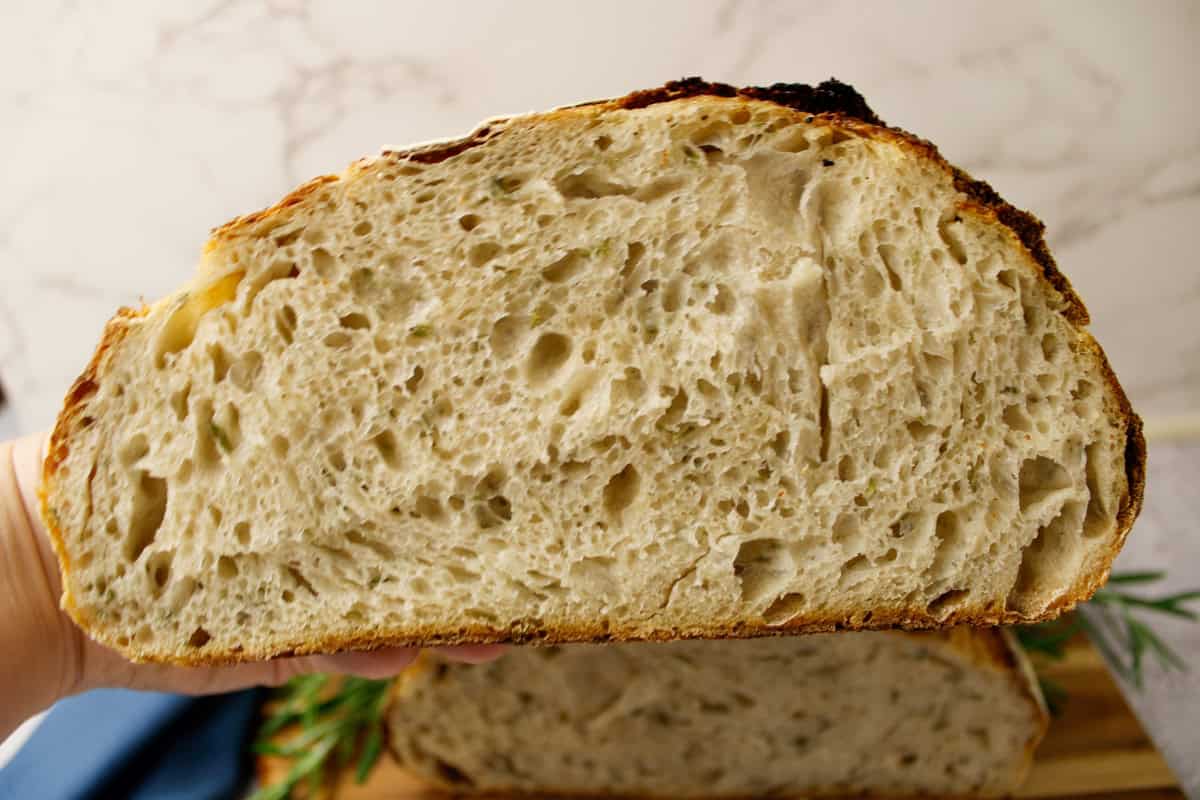
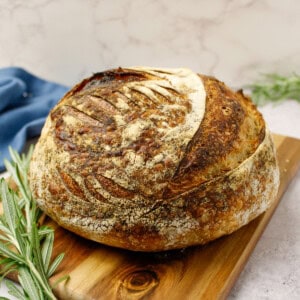
The bold, savory flavor of this rosemary sourdough bread with roasted garlic is absolutely out of this world. It features a deeply caramelized, crackly crust, a beautifully soft interior, and is bursting with rich, sweet roasted garlic cloves and fresh herby notes in every single bite. It pairs beautifully with a hearty winter stew or a rich, tomato-based pasta dish like my favorite Homemade Lasagna.
If you have gained confidence in making your own basic sourdough loaves, you are probably ready to start diving into making "all things" sourdough. Tinkering with simple, flavorful mix-ins is one of the easiest and most rewarding ways to start that journey.
Table of contents
Simply adding a whole head of mashed roasted garlic and chopped fresh rosemary is a brilliant way to elevate your bread baking game, especially when you want to serve a spectacular artisan loaf alongside a main course. Get that starter fed, and let's get baking!
Key Ingredients & Substitutions
- Fed Sourdough Starter: Ensure your starter is active, bubbly, and fully fed for the absolute best rise and oven spring.
- Bread Flour: While some recipes use all-purpose flour, switching to 100% high-quality bread flour is the ultimate secret to a perfect herb-infused loaf. Because bread flour has a higher protein content (typically 12-14%) than all-purpose flour, it develops a much stronger, thirstier gluten structure. This strength is essential for holding onto the 70% hydration water ratio and supporting heavy add-ins like fresh herbs and wet garlic without flattening out or getting gummy.
- Water: Filtered, slightly warm water is highly recommended anytime you're making sourdough to avoid chlorine interfering with your dough's fermentation.
- Kosher Salt: Essential for both tightening the gluten network and highlighting the savory herbs.
- Roasted Garlic: One full head of garlic, roasted until sweet and completely tender, then lightly mashed. Pro Tip: Always use roasted garlic rather than raw garlic! Raw garlic has natural anti-bacterial properties that can stunt or completely kill wild sourdough yeast during bulk fermentation. Roasting caramelizes the sugars, making it completely safe for your yeast and incredibly delicious.
- Fresh Rosemary: I recommend using roughly two tablespoons of finely chopped fresh rosemary. Fresh rosemary offers vibrant aromatic oils that dried rosemary just can't match, though you can use dried in a pinch (just use a bit less as it is more concentrated).
See the recipe card below for the full list of ingredients and measurements.
How To make Rosemary Sourdough Bread with Roasted Garlic
For this flavor variation, I follow my classic sourdough baking method. The secret here is that we add the mashed roasted garlic, chopped rosemary, salt, and active starter to the dough all at the exact same time. This ensures that the savory inclusions are thoroughly mixed and distributed while the dough is initially being worked.
Here is exactly how to bring this artisan loaf together step-by-step:
- Mix your bread flour and warm water together in a large bowl until no dry flour remains. Cover the bowl with a damp cloth and set it aside to autolyse for 1 hour. This allows the flour to hydrate completely and kicks off gluten development naturally.
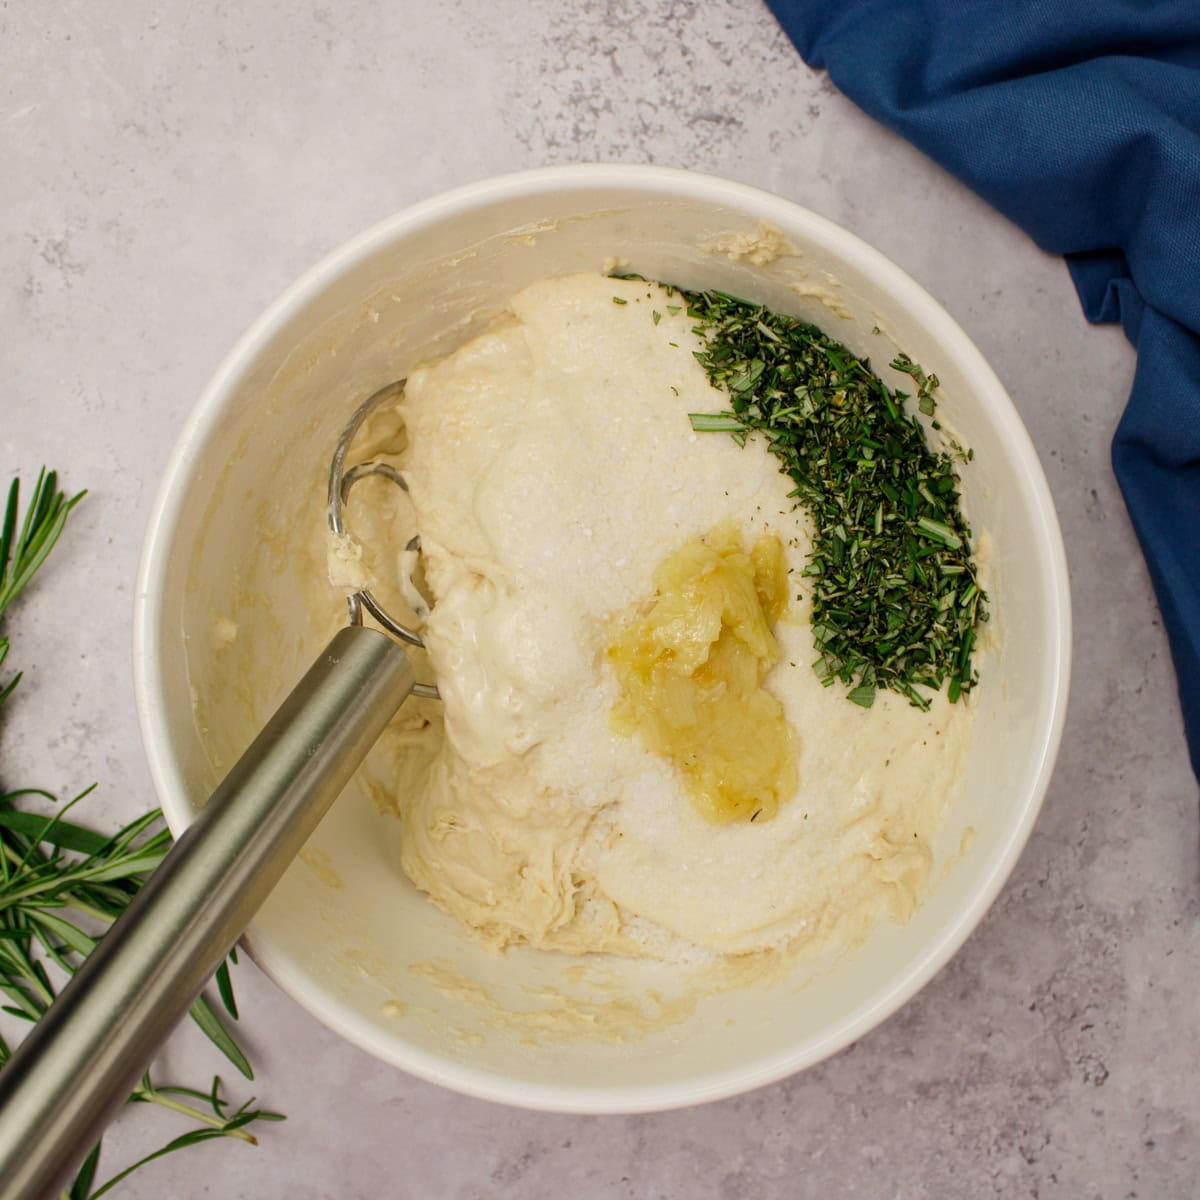
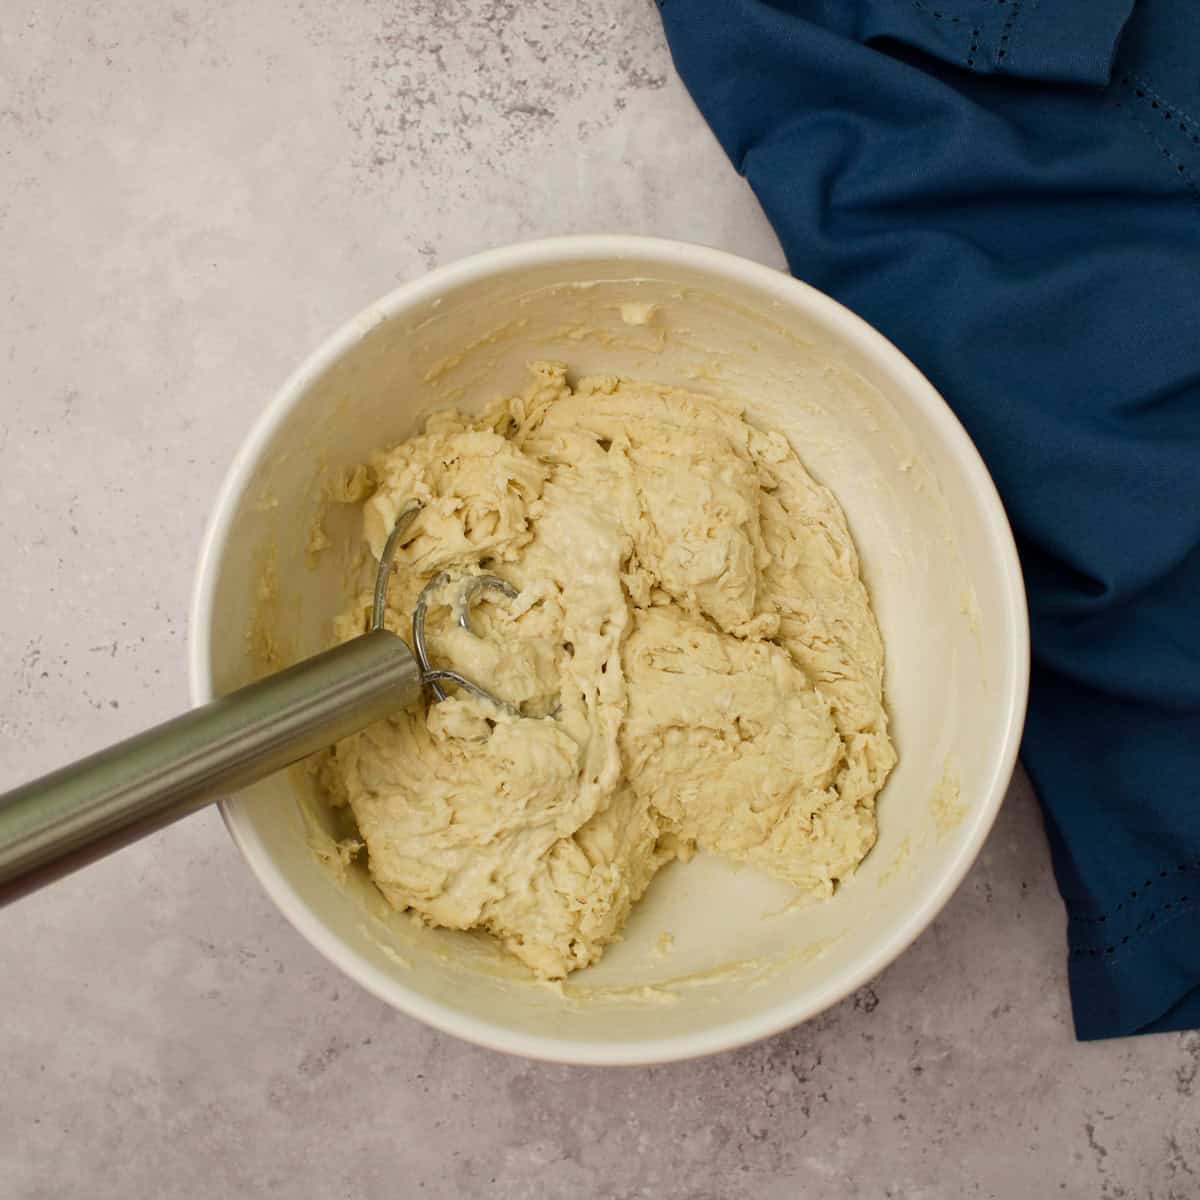
- Add your active, bubbly starter, Kosher salt, mashed roasted garlic, and finely chopped fresh rosemary directly to the hydrated dough. Knead the mixture thoroughly, using a traditional slap-and-fold technique or a gentle, focused hand-kneading method right inside your mixing bowl, until the dough comes together and the garlic and herbs are evenly distributed.
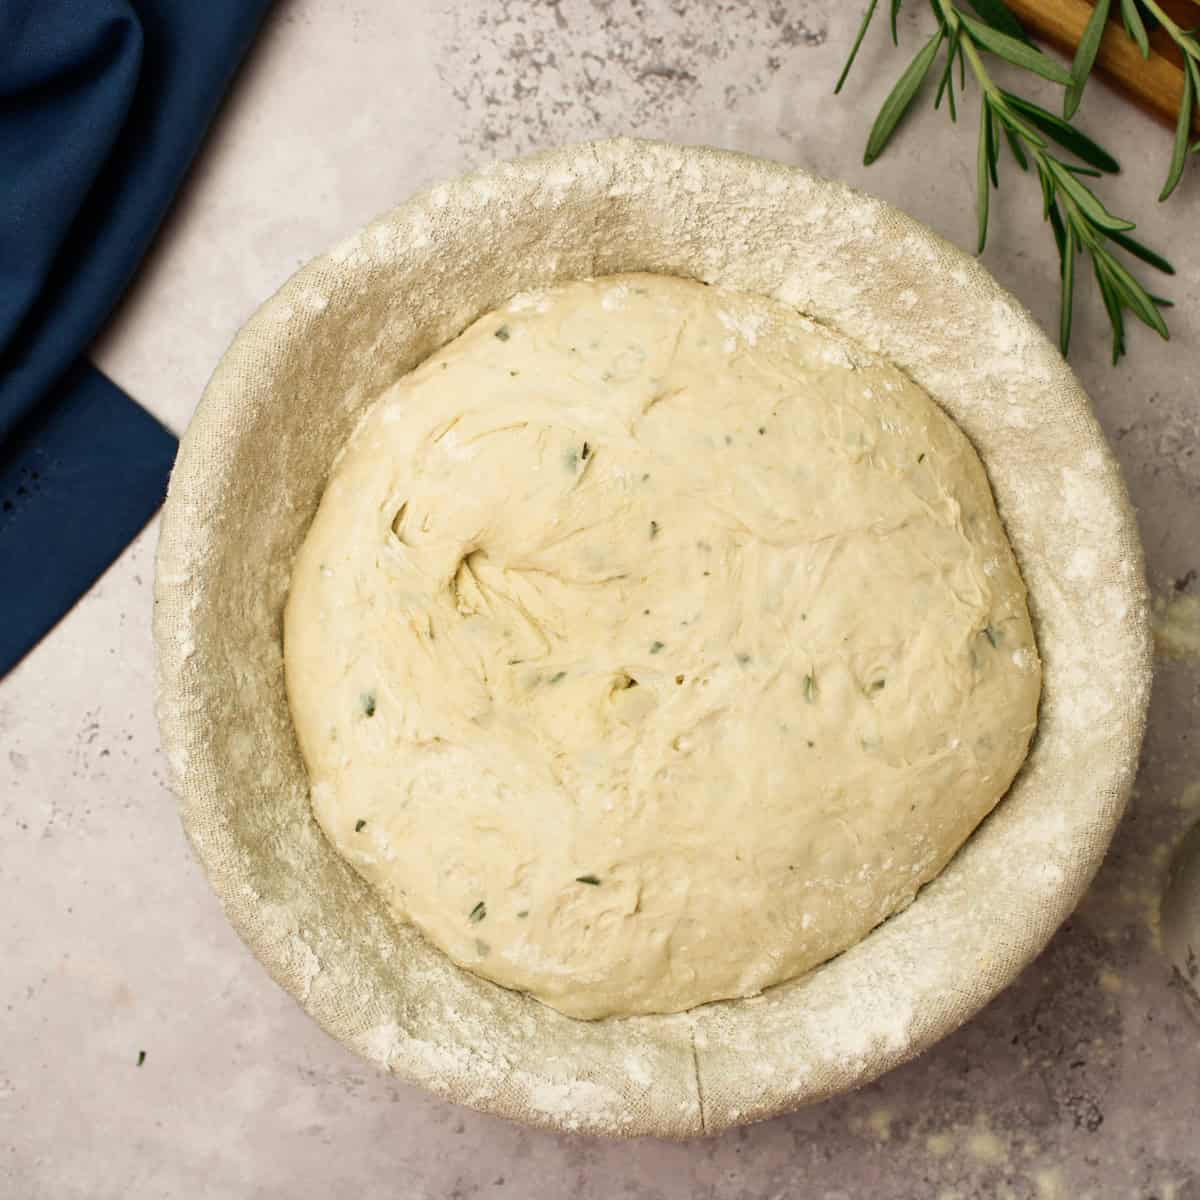
- Perform your standard series of stretch-and-folds over the next few hours to build structure, let the dough bulk ferment in a warm place until it doubles in size, and then shape your loaf. Place the shaped dough into a floured banneton basket or a parchment-lined bowl, cover it with a plastic bag, and transfer it to the refrigerator to retard overnight for 12 to 24 hours.
- Turn your chilled dough out into a roaring hot, preheated cast iron Dutch oven at 500°F. Score the top deeply, cover with the lid, and bake for 20 minutes. Remove the lid, drop the oven temperature to 450°F, and bake for another 20 minutes until the crust is a deep golden color. Let it cool completely on a wire rack before slicing! Enjoy!
See the recipe card below for the full recipe.
Sample Sourdough Baking Schedule
The entire sourdough process relies heavily on a warm environment. In a colder setting, fermentation can take significantly longer. Below is my favorite universal baking timeline to help you plan your day.
7:00 a.m. - Feed your sourdough starter. (Tip: Use warm water and place it on your stove with the stove light on to help it activate faster).
12:00 p.m. - Autolyse: Mix together the flour and water, cover, and set aside for 1 hour.
1:00 p.m. - Add the remaining ingredients (starter, salt, garlic, rosemary). Begin your kneading technique for 5 minutes until smooth. Cover and let rest for 30 minutes.
1:35 p.m. - Stretch and Folds: Perform 6 total sets of stretch-and-folds. Rest 15 minutes between the first 3 sets, and 30 minutes between the last 3 sets. (Tip: If your kitchen is cold, place the bowl in the oven with the light on, warming the oven for 10-15 seconds during each rest).
3:50 p.m. - Bulk Fermentation: Cover and let the dough rest in a warm spot until completely doubled in size.
8:00 p.m. - Shape & Cold Retard: Gently turn the dough out, shape it into a tight round boule, and place it seam-side up into a floured banneton. Cover and refrigerate for 12 to 24 hours.
The Next Morning (8:30 a.m.) - Preheat your Dutch oven at 500°F for 1 hour.
9:30 a.m. - Score the chilled dough, transfer to the Dutch oven, and bake!
👉 Sky's Tips
- Handling Sticky Dough: Keep a small bowl of water next to your workspace while kneading or folding. Dipping your fingertips in water prevents the high-hydration dough and sticky roasted garlic from clinging to your hands without adding excess flour.
- Wait to Slice: No matter how incredible your kitchen smells, let the bread cool completely on a wire rack before slicing into it. Slicing a hot loaf traps the remaining steam inside, resulting in a sticky, gummy interior texture.
- The Oven-Light Hack: Sourdough loves a cozy environment. If your house runs cold, use your unlit oven with just the stove light turned on as a makeshift proofing box. If it's extra chilly, click the oven heat on for just 10-15 seconds to cut the chill, then shut it off immediately.
How To Roast Garlic
- Preheat your oven to 400°F (204°C). In a small, oven-safe baking dish or pan, lay out a piece of aluminum foil large enough to wrap a whole head of garlic.
- Slice the very top off the head of garlic just enough to completely expose the individual cloves inside.
- Place the exposed garlic head onto the foil, drizzle generously with a high-quality olive oil, and close the foil tightly around it to trap the steam.
- Roast in the oven for roughly 40 minutes. Check for doneness by using a pair of tongs to gently squeeze the head-the garlic cloves should feel completely soft, tender, and look beautifully golden brown. Let it cool completely before squeezing the cloves out to mash.
Storage Tips
At Room Temperature: I have found that homemade sourdough bread will keep beautifully for about 5 days when properly cared for. The best storage method is to simply wrap the sliced loaf in a clean, breathable cloth tea towel and store it in a cool, dark place like a bread box or cupboard. Avoid plastic bags, which trap moisture and make the artisan crust go soft!
To Refresh a Loaf: Sourdough is absolutely best on day one, but it makes incredible toast later in the week. You can easily revive a slightly stale loaf by popping it into a 350°F oven for 5-10 minutes until warmed through and crisp.
To Freeze: Sourdough freezes incredibly well. Slice the loaf completely, place the slices into a freezer-safe bag, and freeze for up to 3 months. You can pull individual slices straight from the freezer and toast them in your oven!
There you have it, a crusty, savory, artisan masterpiece right from your very own oven! This rosemary sourdough bread with roasted garlic is bound to make your whole kitchen smell like a gourmet bakery, and it is always the absolute star of the dinner table. I hope you get a chance to try it soon!
-Sky🩷


FOLLOW ME on Facebook, Pinterest, and YouTube to stay connected!
If you tried this Rosemary Sourdough Bread recipe or any other recipe on my blog, please leave a 🌟star rating and let me know how it went in the comment section below!
📖 Recipe
Rosemary Sourdough Bread with Roasted Garlic
Ingredients
- 1 head of garlic roasted and mashed
- 2 tablespoons fresh rosemary roughly chopped
- 500 grams bread flour
- 350 grams warm water filtered
- 100 grams sourdough starter fed and active
- 10 grams salt
Instructions
- About 1 hour before you anticipate your fed sourdough starter being at its peak activity, combine the 350 grams of warm filtered water and 500 grams of bread flour in a large mixing bowl. Stir with a dough whisk or your hands just until no dry flour remains and a shaggy dough forms. Cover the bowl with a damp cloth and allow it to sit undisturbed for 1 hour to autolyse.
- After 1 hour add the mashed garlic, minced rosemary, 100 grams of active starter and 10 grams of salt to the dough.
- Begin kneading the dough using a traditional slap-and-fold technique on a clean surface, or perform a focused, gentle kneading motion right inside the bowl. Continue working the dough for about 5 minutes, or until it starts to smooth out, pull away from the sides, and cleanly incorporate all the garlic and herbs. Cover with the damp cloth and let rest for 30 minutes in a warm spot.
- The 15-Minute Intervals: After 30 minutes, perform your first stretch-and-fold. Grab one side of the dough, stretch it upward gently, and fold it over the center. Rotate the bowl 90 degrees and repeat until all four sides are folded. Cover and rest for 15 minutes. Repeat this stretch-and-fold process two more times at 15-minute intervals.
- The 30-Minute Intervals: Once the short intervals are complete, perform another stretch-and-fold, cover, and let rest for 30 minutes. Repeat this process two more times at 30-minute intervals (for a total of three 30-minute cycles). You will notice the dough becoming smoother, shinier, and holding its shape much better with each set.
- Bulk Fermentation & Shaping: Cover the dough with the damp cloth and let it sit undisturbed to bulk ferment at room temperature for several hours. The dough is ready to shape when it has roughly doubled in size, looks puffy, and shows a few air bubbles on the surface. (Note: This can take anywhere from 5 to 8 hours depending on the temperature of your kitchen).
- Turn the fermented dough out onto a lightly floured surface. Gently shape it into a tight round boule.
- Place the shaped dough seam-side down into a floured banneton basket, or into a bowl lined with parchment paper for effortless lifting later. Cover the basket with a plastic bag to lock in moisture and transfer it to the refrigerator to cold-retard overnight (aim for 12 to 14 hours).
- Scoring and Baking: One hour before you are ready to bake, place your cast iron Dutch oven (with the lid on) into the oven and preheat it to 500°F for 1 hour.
- When fully preheated, carefully remove the hot Dutch oven. If using the parchment paper method, gently lift the chilled dough out of the bowl by the edges of the paper, score the top deeply with a sharp lame or razor blade, and lower it directly into the hot pot. (If not using parchment, lightly flour the bottom of the hot pot, invert the dough directly into it from the banneton, and score).
- Cover the Dutch oven with its hot lid and place it into the oven to bake covered for 25 minutes. After 25 minutes, carefully remove the lid from the Dutch oven. Bake uncovered for an additional 15 minutes, or until the crust is deeply browned and caramelized.
- Carefully remove the bread from the pot and transfer it to a wire cooling rack. Allow the loaf to cool completely for at least 1 to 2 hours before slicing to let the interior crumb set perfectly. Enjoy!


jacque says
your directions say.... reduce the heat to 450° F and remove the top cast iron pan. What am I reducing it from?
Sky Pilgreen says
Hi, sorry about that. The dutch oven should be preheated in a 500°F oven.
Sara Welch says
This was such a quick and easy recipe that does not disappoint! Turned out light, fluffy and delicious; easily, a new favorite recipe!
Sky Pilgreen says
That's great to hear, thank you!
Gianne says
The flavors are perfectly balanced, with just the right amount of garlic and rosemary. The crust is perfectly crispy, and the inside is wonderfully chewy. It's a definite must-try!
Sky Pilgreen says
Thank you for your wonderful comment!
Ieva says
Thanks for the recipe - we love roasted garlic in our bread, but typically make garlic and olive sourdough! This was a nice change, and it worked brilliantly!
Sky Pilgreen says
Garlic and olive sourdough sounds delicious! I am so glad to hear you like the roasted and rosemary bread.
Saif says
This looks amazing. I didn't expect the combination of roasted garlic and Rosemary will make the bread delicious. Definitely going to give it a try.
Sky Pilgreen says
Thank you!
Ned says
This is the most delicious, moist bread I've had in a long time. Thank you for this yummy recipe! Can't wait to make it again!
Sky Pilgreen says
Thank you!