If you are looking for a simple Sourdough Bread recipe, you have come to the right place. This easy sourdough recipe is perfect for beginners and seasoned bakers.
There is something quite therapeutic about baking a loaf of homemade sourdough bread. The quality is far better than any sourdough that you can buy from the store. Not to mention, you control what goes in it.
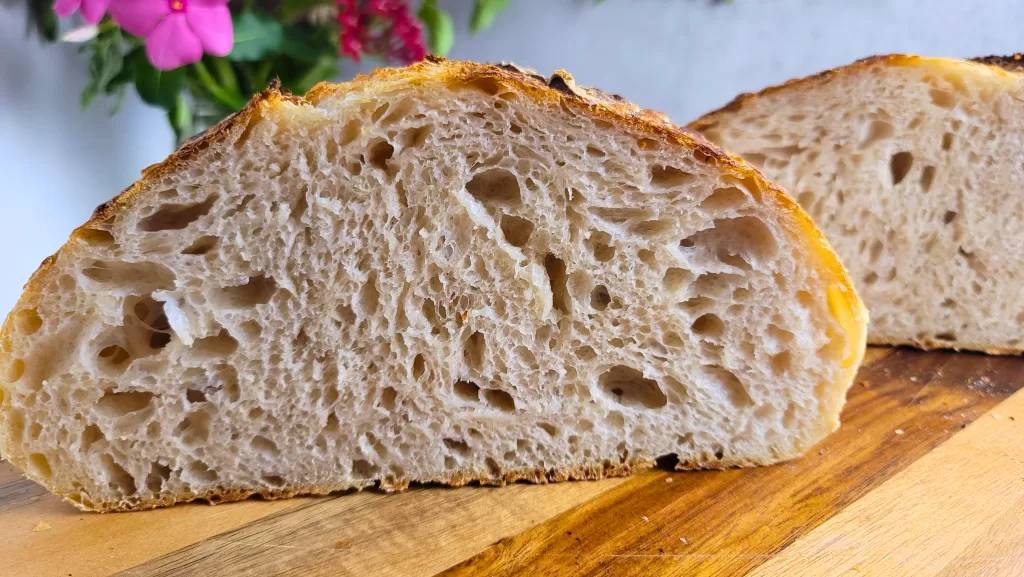
The entire process, from feeding the starter to stretching and folding the dough, fermenting, shaping, and finally baking, becomes more intuitive and effortless with each attempt. The ultimate reward is the end product: a beautifully crusty and delicious loaf of sourdough bread, handcrafted by you!
Table of contents
My Latest Videos
Why Is Sourdough Bread So Popular?
Sourdough bread has gained popularity due to its simplicity in preparation and its health benefits over traditional sandwich bread.
The fermentation process that sourdough goes through make the bread much easier to digest than bread that is made without the fermentation process.
Making the dough the day before and allowing it to sit overnight in the refrigerator makes it easy to fit into my daily schedule. Which means I am baking my bread first thing in the morning. If baking your bread in the morning is not an option, you can adjust the times to fit your schedule.

I find that the best fermentation happens with at least 12 hours of resting in the refrigerator. However, you can bake in as little as 10 hours or even longer than 12 hours.
How To Tell If Your Sourdough Starter Is Active
The key to successful sourdough bread is ensuring that your starter is active and ready for use. An inactive starter means your bread won't rise. Fortunately, it's simple to test. I like to place a rubber band around the jar at the level of the starter when I feed it. After a few hours, I can easily see if the starter has risen and by how much.
You can gauge the activity of the starter by the bubbles on its surface; an active starter will have many. To test it, drop a small amount of the starter into a bowl of water; if it floats, it's active and ready for use.
Equipment For Making Sourdough Bread
- A kitchen scale is essential for accurately measuring ingredients. Especially since it is best to measure in grams.
- Large mixing bowl is needed to allow the dough enough room to rise.
- Banneton is a basket used to proof bread in. You can use a bowl if you do not have a banneton.
- Bowl Scraper is your best friend when making anything with sourdough.
- Bread Lame or razor blade to score the bread. If you do not have either of the two, a really sharp knife can be used.
- Dutch Oven for baking the bread. Covering the dough as it bakes allows it to steam, which creates the super crusty crust. I use a Lodge Cast Iron Dutch Oven that I found on amazon. I absolutely love baking my sourdough in this dutch oven.
Sourdough Bread Schedule
Below is a schedule for making sourdough bread. It's important to note that the entire process relies on a warm environment. In a colder setting, the process could take significantly longer.
I use warm water when feeding my starter and put it on my stove with the stove light on. This helps the starter become active faster. When the kitchen is colder, I will keep my dough in the oven and periodically warm it up by turning the oven on for 10 to 15 seconds, just enough to warm it. I will do this every time I do a stretch and fold. Again, while it is bulk fermenting.
If your schedule is more flexible or it is warmer where you are making it, then you may not need to do these things. Also keep in mind that the entire schedule can vary depending on the amount of time it takes your starter to be fully active and is ready to be used.
7 a.m Feed your starter.
12 p.m. Mix together the flour and water and set aside to autolyse.
1 p.m. Mix in the remaining ingredients. Begin the slap and fold technique. This a kneading technique used for wet doughs that are rather tricky to handle.
Tip
Keep a bowl of water nearby to help handle the sticky dough.
Begin by putting the dough onto a clean work surface. Dip your fingertips in the water, grabbing from the middle, pick the dough up with both hands. Slap it down onto the work surface then stretch it up towards your body and fold over the dough.
When picking the dough back up, grab from the middle, turn 90° and repeat the process for 5 minutes. The dough will start to smooth out as you knead.
(Recently, I've adopted a gentler version of the slap and fold method, performed directly in the bowl. I use the same technique but without the slapping motion; instead, I allow the dough to stretch slightly before folding it over to continue the process.)
Place the dough back into your bowl, cover with a damp towel or plastic wrap, place in a warm spot and let rest for 30 minutes.
1:35 p.m. Begin stretching and folding the dough.
With the dough still in the bowl, dip your fingers in the water and reach down into the bowl, grab the bottom of the dough firmly and pull up, stretching as far as the dough allows, and then fold it over to the other side.
Turn the bowl slightly and continue until all of the dough has been stretched and folded 1 time. Do this 6 times, allowing the dough to rest for 15 minutes in between the first 3 stretch and folds and 30 minutes in between the last 3 stretch and folds.
3:50 p.m. Cover and let rest to bulk ferment until doubled.
8 p.m. This time may vary, depending on how long it takes for your dough to double in size. Pour the dough out onto a lightly floured work surface. Being gentle to prevent deflating the bubbles in the dough.
Shape the dough by pulling the right side over onto the left side, then pulling the left side over onto the right side. Then pull the top up and back towards your body, using the dough to round out the dough and make the shape tight.
Place into a generously floured banneton with the seam side facing up. Dust with more flour, cover with plastic wrap or a towel and place in the refrigerator for at least 12 hours.
In The Morning
8:30 a.m. Preheat a dutch oven in a 450° F oven for 1 hour.
9:30 am Lightly flour the dutch oven or line with parchment paper. Remove the bread from the refrigerator and carefully place it in the dutch oven, or on the parchment paper and score with a bread lame. Place the top of the dutch oven back on and place into the oven for 25 minutes.
Remove the lid and continue baking for another 15 minutes. Remove from the oven and place on a wire rack to cool.
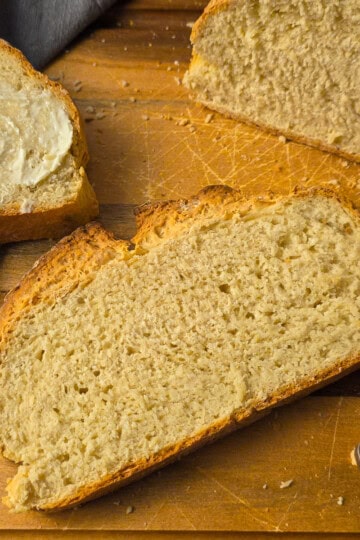
Now for the hard part, allow the bread to cool completely before slicing. Enjoy!
Tip
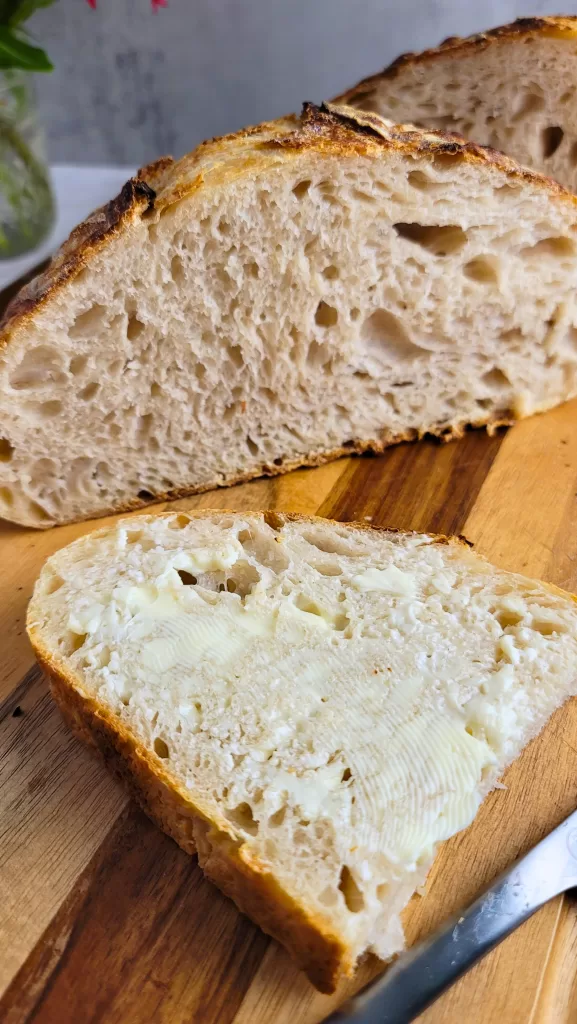
Let the bread cool completely before slicing it. Slicing the bread before it properly cools will result in a sticky, gummy interior texture.
FOLLOW ME on Facebook, Pinterest, and YouTube to stay connected!
If you tried this Easy Sourdough Bread recipe or any other recipe on my blog, please leave a 🌟star rating and let me know how it went in the comments below!
📖 Recipe

Sourdough Bread
Equipment
- Round Banneton Proofing Basket
- Bread Lame
- Dutch Oven
Ingredients
- 500 grams bread flour
- 350 grams warm water filtered
- 100 grams starter fed and active
- 10 grams salt
Instructions
- Combine the warm water and flour, cover and allow to sit for 1 hour.
- Mix in the remaining ingredients. Begin the slap and fold technique, continue for 5 minutes. Cover and set aside for 30 minutes.
- Begin stretching and folding the dough. With the dough still in the bowl, dip your fingers in the water and reach down into the bowl, grab the bottom of the dough firmly and pull up, stretching as far as the dough allows, and then fold it over to the other side. Turn the bowl slightly and continue until all of the dough has been stretched and folded 1 time. Do this 6 times, allowing the dough to rest for 15 minutes in between the first 3 stretch and folds and 30 minutes in between the last 3 stretch and folds.
- Cover and let rest to bulk ferment until doubled.
- Remove from the bowl and place on a lightly floured work surface. Shape the dough by pulling the right side over onto the left side, then pulling the left side over onto the right side. Then pull the top up and back towards your body, using the dough to round out the dough and make the shape tight. Place into a generously floured banneton with the seam side facing up. Dust with more flour, cover with plastic wrap or a towel and place in the refrigerator for at least 12 hours.
- Preheat a dutch oven in a 450° F oven for 1 hour.
- Lightly flour the dutch oven or line with parchment paper. Remove the bread from the refrigerator and carefully place it in the dutch oven, or on the parchment paper and score with a bread lame. Place the top of the dutch oven back on and place into the oven for 25 minutes.
- Remove from the oven and place on a wire rack to cool. Allow to completely before slicing. Enjoy!
Notes
- Recently, I've adopted a gentler version of the slap and fold method, performed directly in the bowl. I use the same technique but without the slapping motion; instead, I allow the dough to stretch slightly before folding it over to continue the process.
- Keep a bowl of water nearby to help handle the sticky dough.
- Let the bread cool completely before slicing it. Slicing the bread before it properly cools will result in a sticky, gummy interior texture.


Tayler says
I've tried a couple sourdough bread recipes to no avail. Tried this one and it was perfect! I love how my bread turned out!
Nikki says
This sourdough bread looks absolutely amazing! I can't wait to try this out.
Sky Pilgreen says
Thank you!
Harriet Young says
I loved this recipe, Sky! The instructions were clear and the sourdough was just a joy to make. It turned out perfectly. Thank you!
Sky Pilgreen says
You are very welcome! I am so glad that you enjoyed making this sourdough recipe!
Vanessa says
Great tutorial! I have always been a little intimidated to try making sourdough but I am going to give it a go!
Beth says
This bread was so delicious! I love that classic tang and texture. Thank you so much for including tools to make it easier, too. This was the first time I made sourdough bread without wanting to pull my hair out!
Sky Pilgreen says
That's awesome to hear! I know exactly what you mean, I've been there too!
Sonya Lummus says
Can't wait to try this!
Kimberly Smith says
Love your recipes!!!!
Simply Scratch Made says
Thank you!
Brittany says
This was so much easier to make than some of the other recipes I've tried. Thank you!
Simply Scratch Made says
Glad you like the recipe!