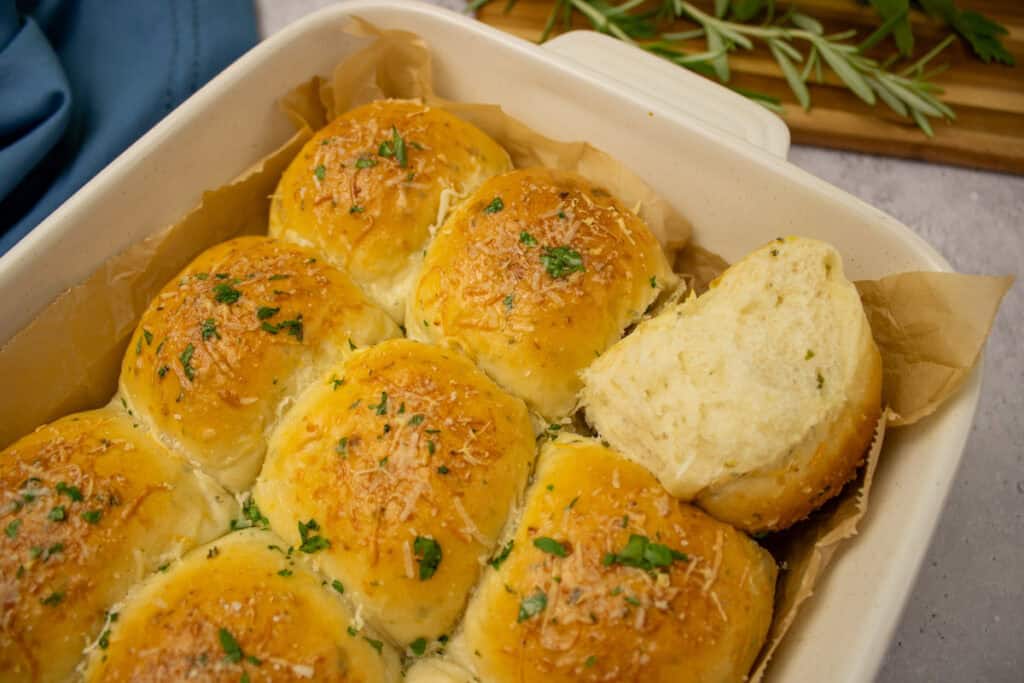
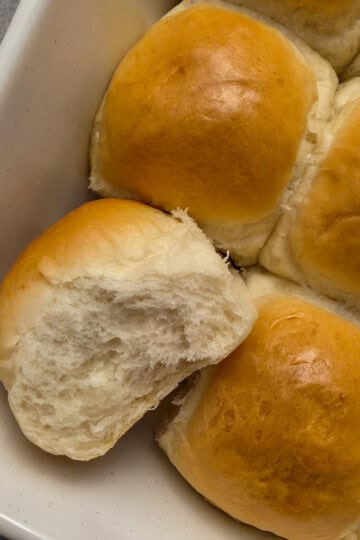
Nothing beats the smell of fresh bread baking in the kitchen, and these homemade garlic dinner rolls are honestly the best thing you'll make all week. They are super soft and fluffy, loaded with fresh garlic, rosemary, and plenty of sharp Pecorino Romano and Parmesan cheese. Whether you need an easy side dish for Sunday dinner or just want something delicious to dip into pasta night, these are always a massive hit at my house. Plus, they are totally freezer-friendly!
My family absolutely loves these rolls, and they are constantly being requested anytime we have pasta for dinner. They are the perfect sidekick for wiping your plate clean after a big bowl of Baked Rigatoni. I also love serving them alongside my Meatballs with Marinara, the garlic and herbs in the rolls pair so well with the marinara sauce for a simple, comforting dinner.
If you love making bread from scratch, you might also like my Homemade Breadsticks or this Roasted Garlic and Rosemary Sourdough Bread!
Table of contents
Key Ingredients & Substitutions
- Honey - A little touch of honey feeds the yeast and adds a nice depth of flavor to the dough. If you don't have honey on hand, you can easily substitute it with regular granulated sugar.
- Cheese - I use a mix of Parmesan and sharp Pecorino Romano directly inside the dough. You can use either finely shredded or grated cheese here, both work perfectly! Feel free to substitute with all parmesan cheese if you do not have Pecorino Romano.
- Garlic and Herbs - For the absolute best flavor, fresh minced garlic and a blend of fresh parsley, oregano, and rosemary are a must. They make the rolls taste so vibrant! If needed, you can substitute with dried herbs instead (just use about one-third of the amount since dried herbs are much more concentrated).
See the recipe card below for the full list of ingredients and measurements.
How To Make Garlic Dinner Rolls
Making yeast rolls from scratch can feel intimidating, but using a stand mixer with a dough hook attachment simplifies the process completely. The dough hook takes over the heavy lifting, making it way less labor-intensive than kneading by hand.
Here is exactly how to bring these savory rolls together step-by-step:
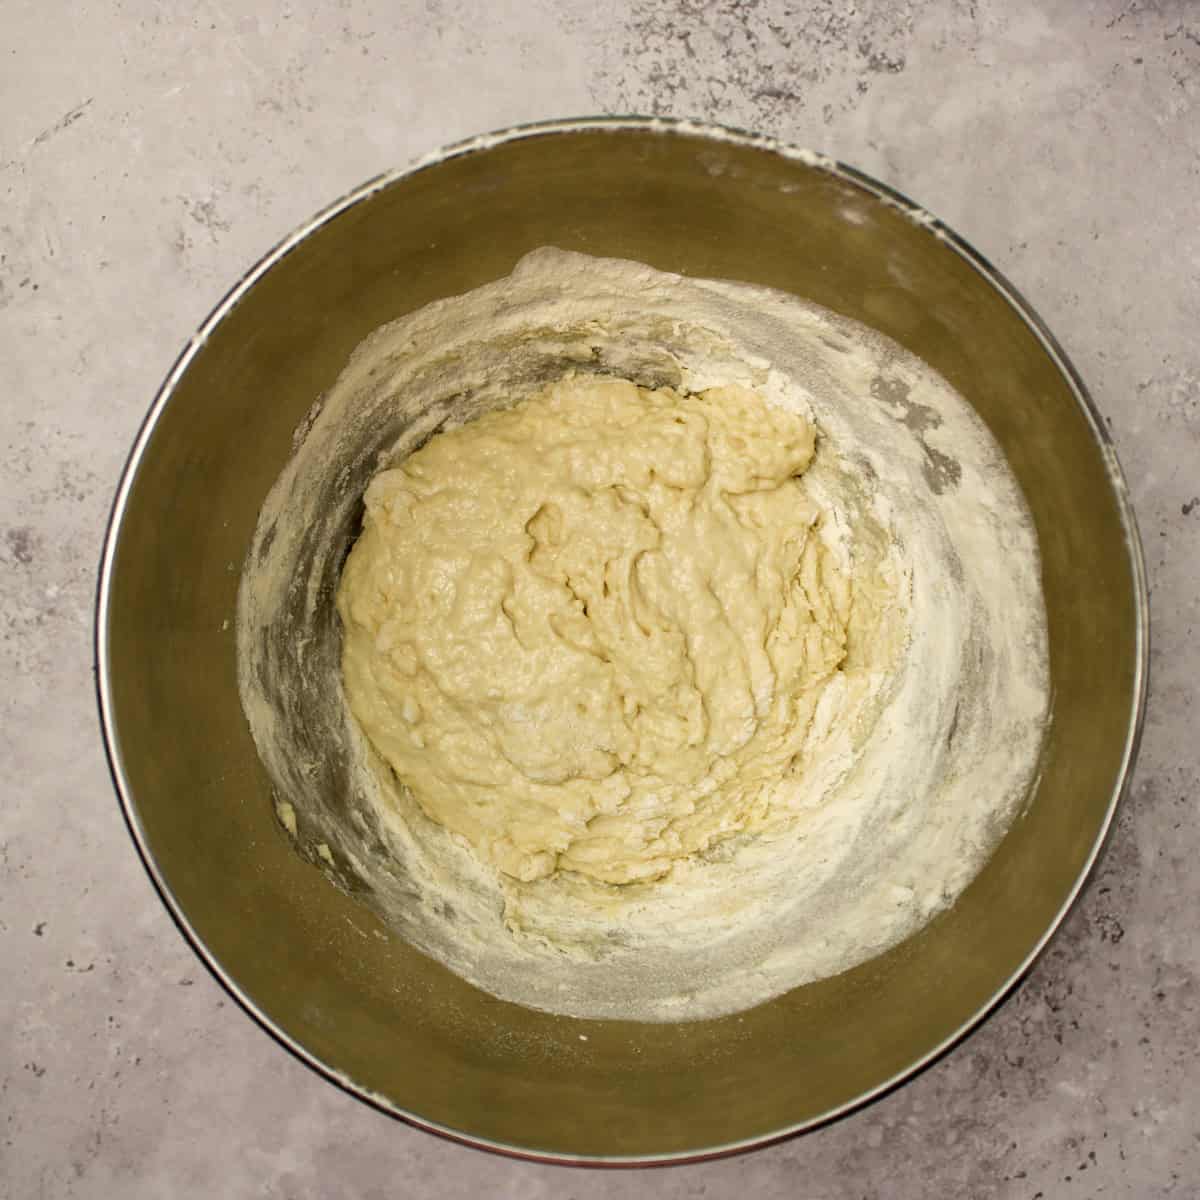
- Mix your warm water, milk, melted butter, and yeast in the mixer bowl and let it bloom. Stir in the honey and salt, then mix in half of the flour until the dough is rough and shaggy.
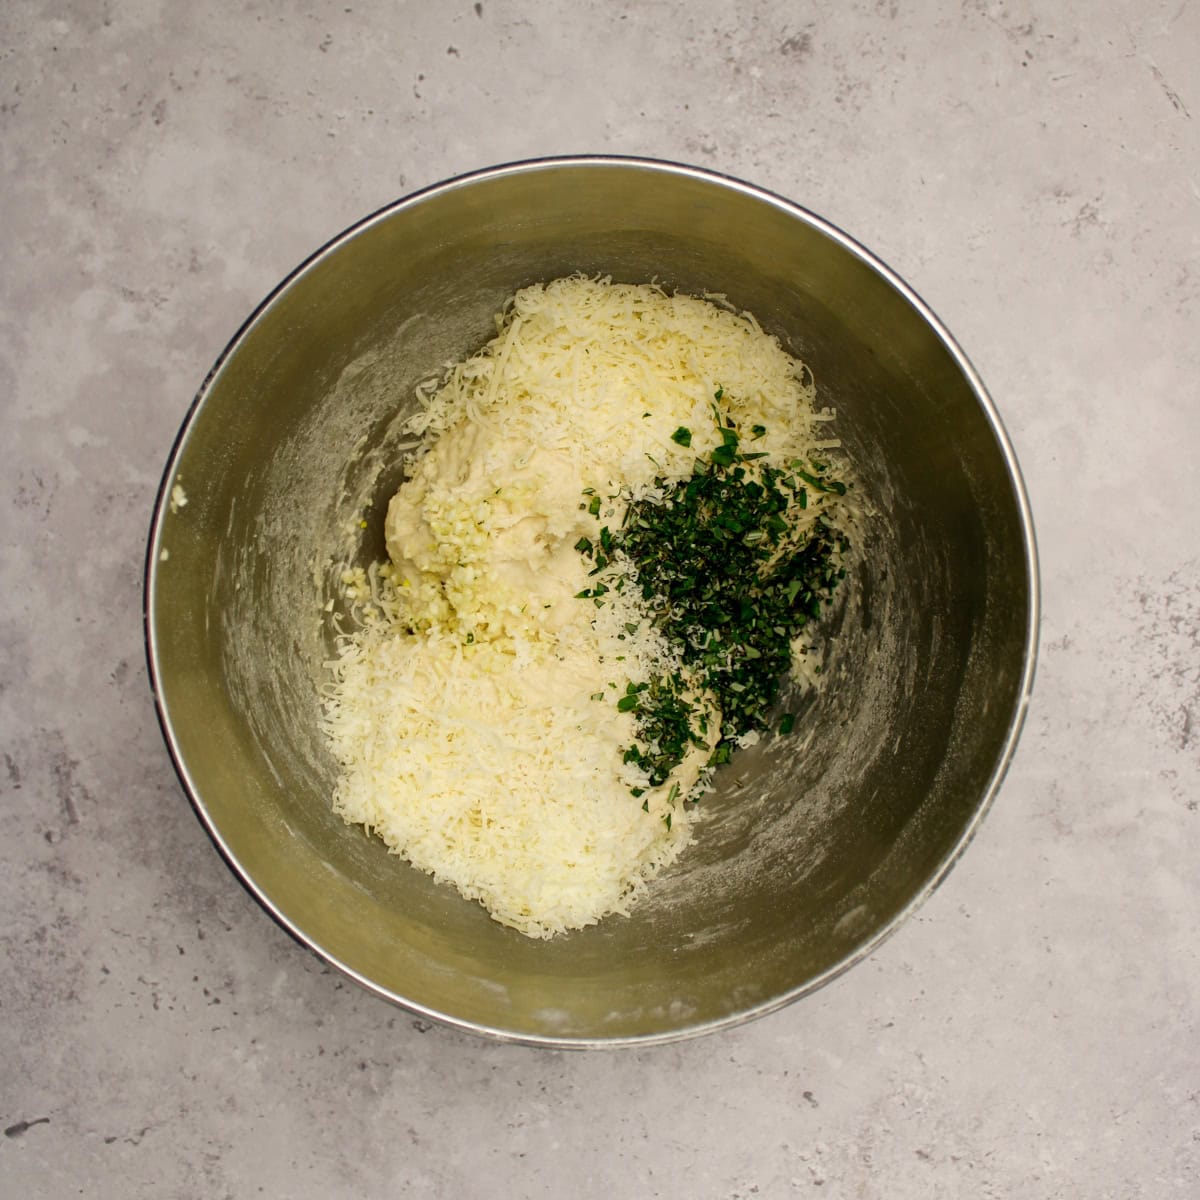
- Add the remaining flour as needed until the dough no longer feels sticky. Not all of the flour may be needed. Now add in both cheeses, minced garlic, and the fresh herbs for the dough. Knead for 10 minutes or until the dough becomes smooth and slightly tacky. It should pass the windowpane test at this point.
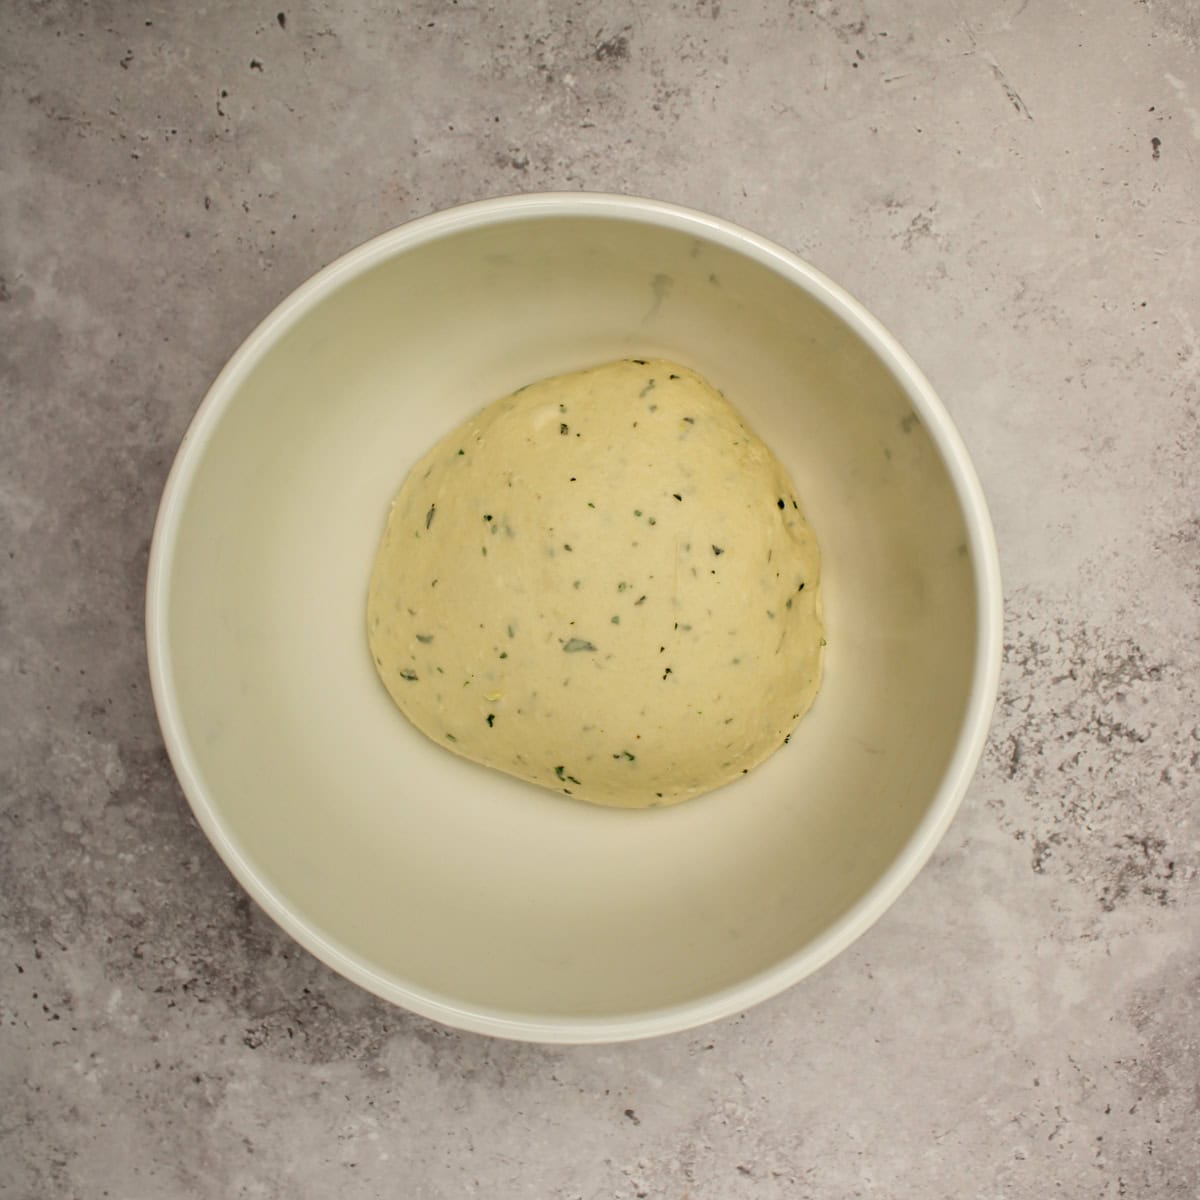
- Once the dough is fully kneaded, lightly oil the bowl, cover, and proof until doubled in size.
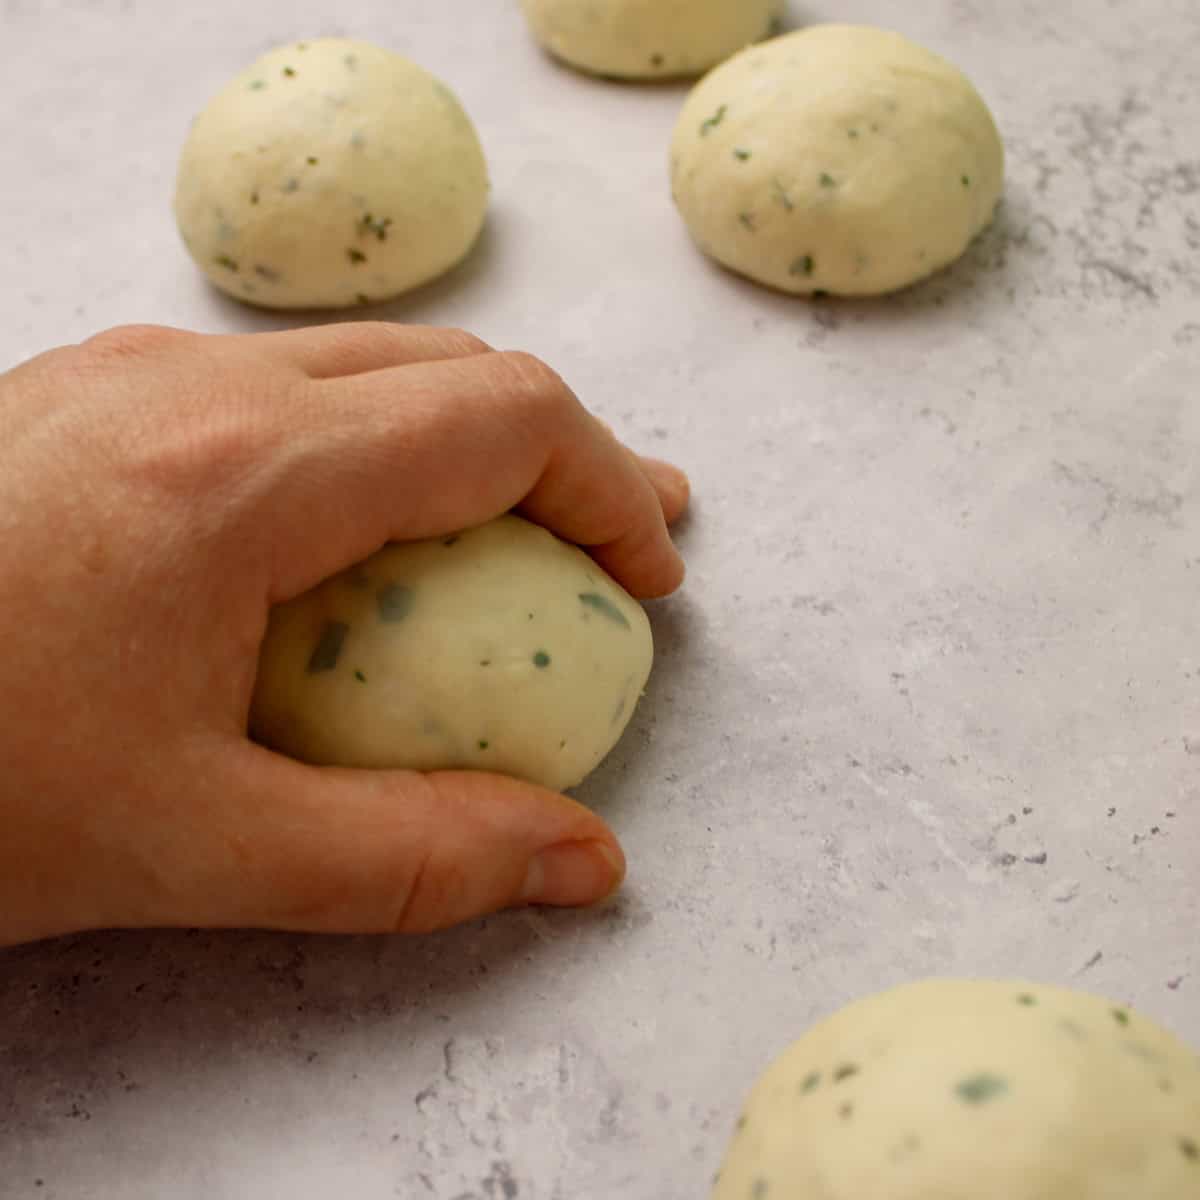
- Deflate the dough and divide it into 12 equal pieces. Cup your hand over each portion and roll it against the counter to form a smooth ball.
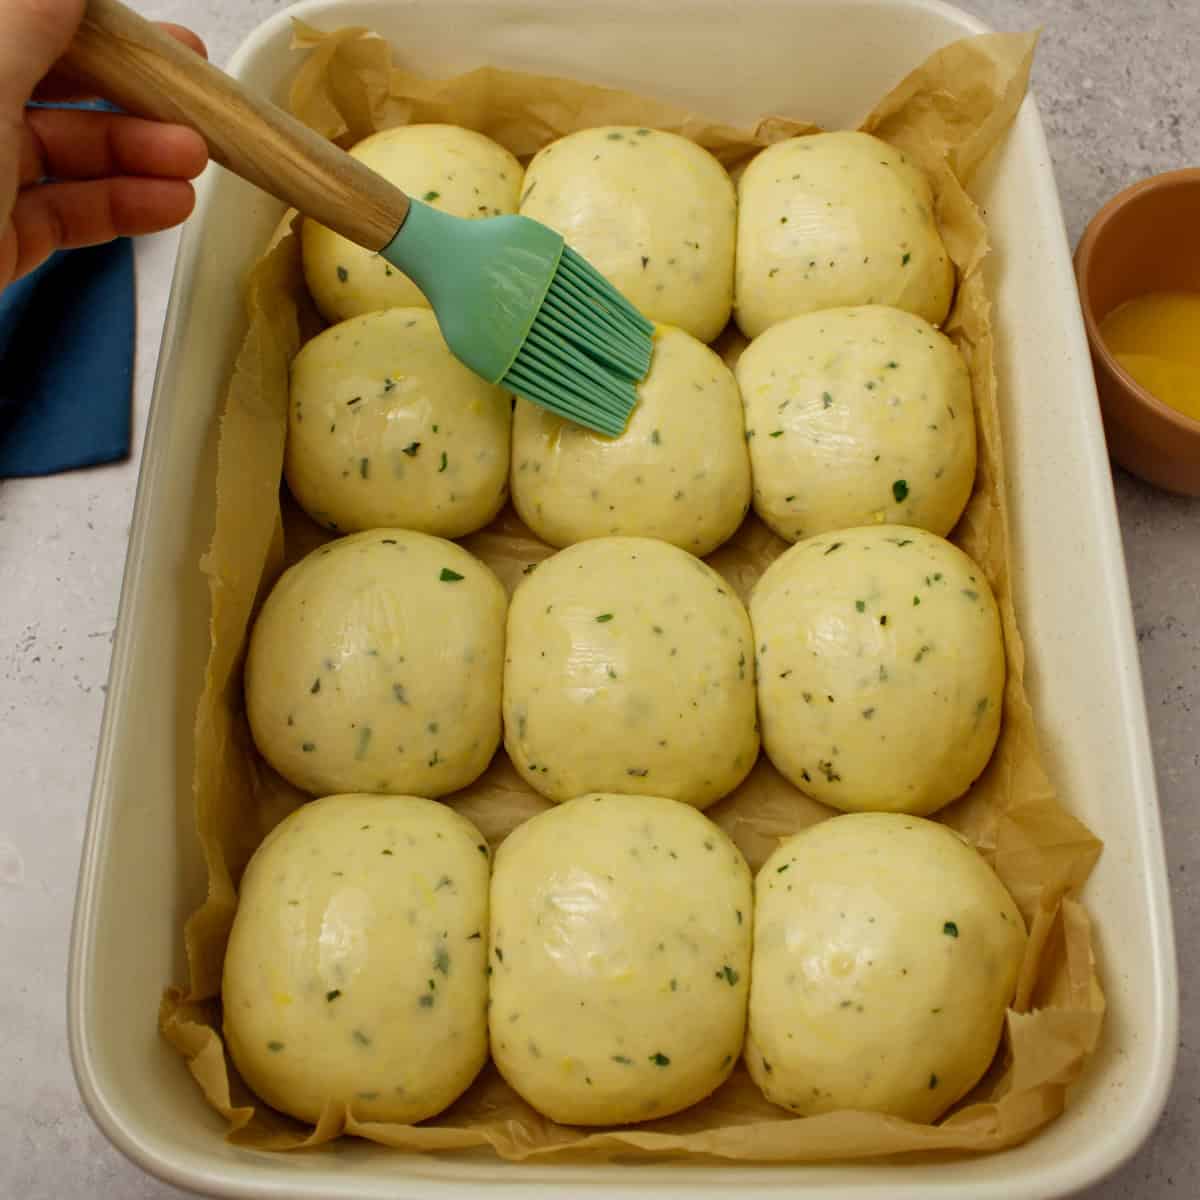
- Place the shaped rolls in your baking dish, cover, and let them proof for 30 minutes until puffy. Brush them with egg wash and top with a generous handful of additional cheese right before baking.
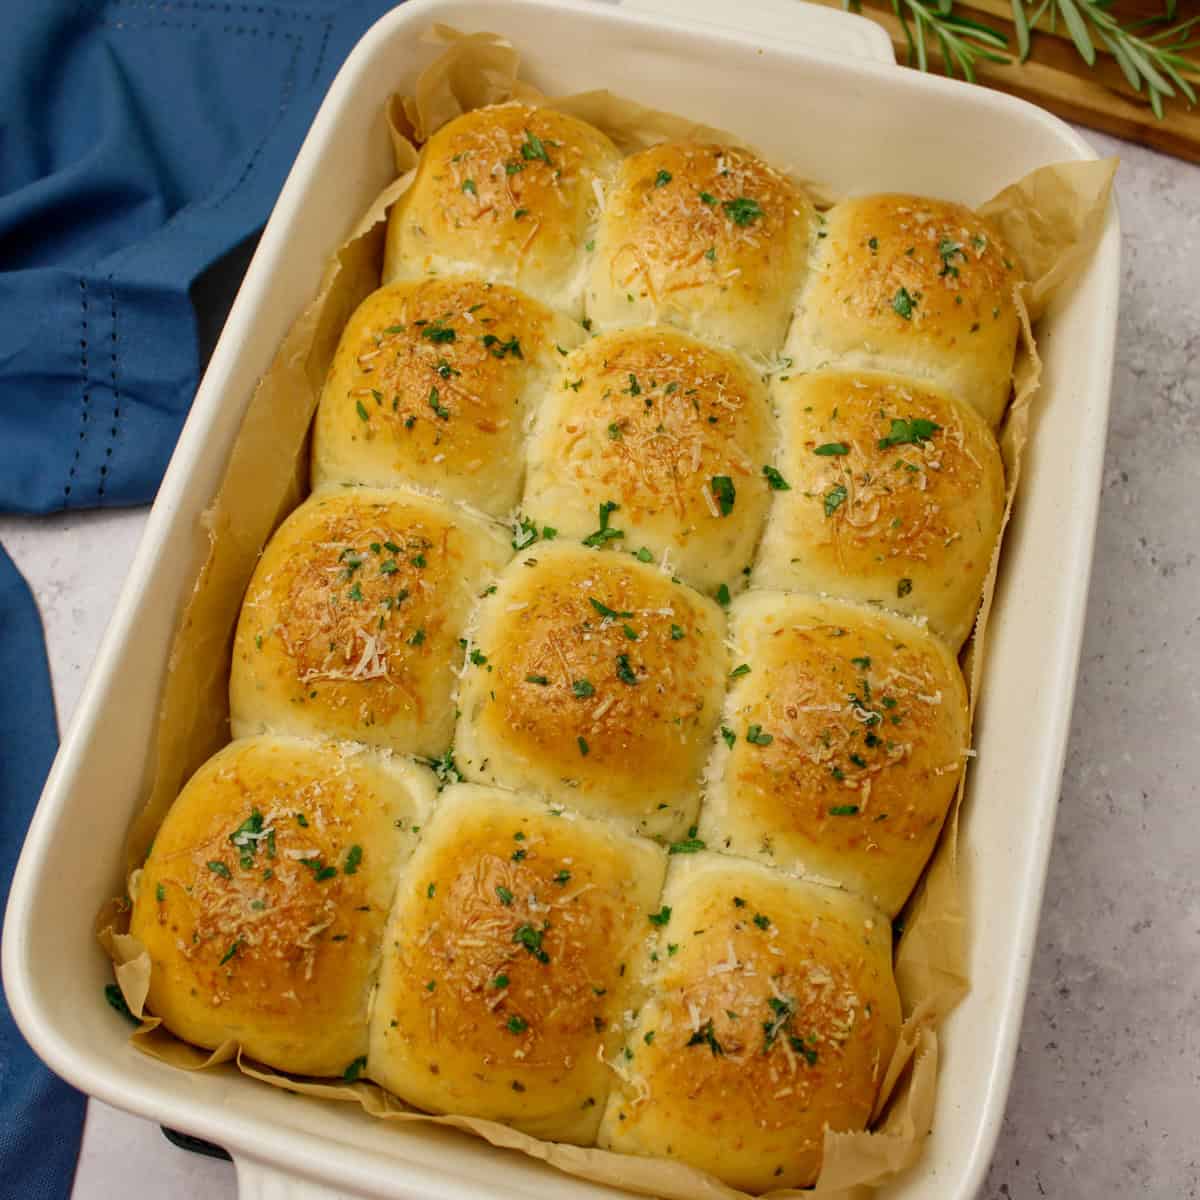
- Bake at 350°F for 25 to 30 minutes. Top with a little fresh parsley and serve them warm! Enjoy!
See the recipe card below for the full recipe.
👉 Sky's Tips
- The Windowpane Test: To check if your dough has been kneaded enough, tear off a small piece from the bowl. Using both hands, gently stretch the dough from the center. If you can stretch it thin enough to see light through it without it tearing, it is ready! If it breaks easily, just keep kneading for another minute or two.
- The Spring-Back Test: After the second 30-minute proof, your rolls should look nicely puffy. Gently press the side of one roll with your finger. If the indentation springs back slowly and leaves a slight dimple, they are ready for the oven. If it snaps back instantly, they need a few more minutes to rise.
Storage Tips
Leftovers: Store baked rolls in an airtight container at room temperature for up to 3 days, or in the fridge for up to 5 days. Reheat in a 300°F oven wrapped in foil for 10 minutes.
To Freeze Unbaked: Shape the rolls and freeze them on a baking sheet until solid, then transfer to a freezer bag. To bake, let them thaw and rise in your baking dish at room temperature (about 4-5 hours) before baking as directed.
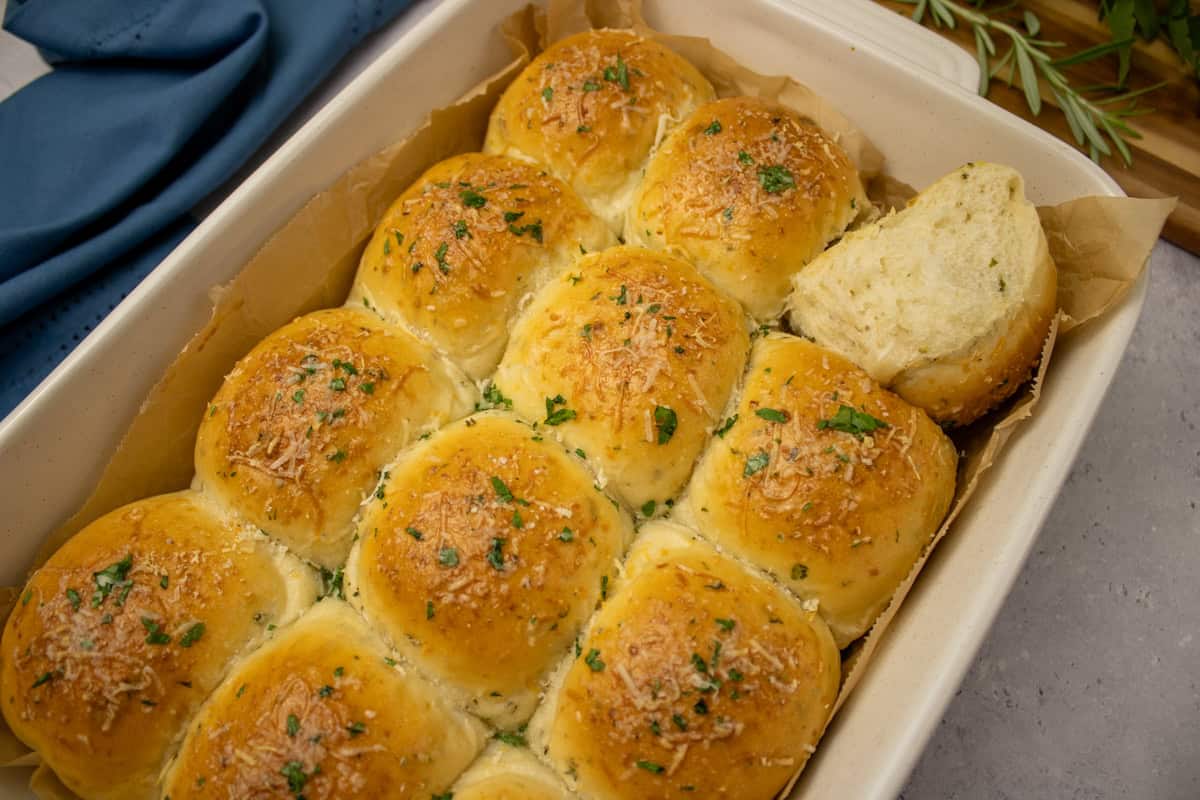
Y'all, when I say these rolls are soft, they are super soft. Mixing that Parmesan and sharp Pecorino Romano right into the dough makes them so incredibly tender and dreamy. I really hope you love these rolls as much as my family does!
-Sky 🩷
More Delicious Recipes


FOLLOW ME on Facebook, Pinterest, and YouTube to stay connected!
If you tried this Garlic Dinner Rolls recipe or any other recipe on my blog, I'd love to hear from you! Leave a 🌟 star rating and let me know how it went in the comment section below!
📖 Recipe

Homemade Garlic Dinner Rolls
Ingredients
Dough
- ½ cup water
- 6 ounces milk
- 2 tablespoons butter
- 1 ¼ teaspoons yeast dry active
- 1 ½ teaspoons honey or sugar
- 1 teaspoon salt
- 3-4 cups all-purpose flour
- 2 teaspoons fresh oregano chopped
- 2 teaspoons fresh parsley chopped
- 2 teaspoons fresh rosemary chopped
- 3 cloves garlic minced
- ½ cup parmesan cheese shredded or grated
- ¼ cup pecorino romano cheese shredded or grated
- 1 large egg
- 1 tablespoon water
Instructions
- In a small saucepan, combine the water, milk, and 2 tablespoons of butter. Heat on low just until the butter melts. Pour into your stand mixer bowl and let it cool until lukewarm 105°F-110°F.
- Sprinkle the yeast over the lukewarm liquid. Let it sit for 5 minutes until frothy.
- Add the honey and salt to the bowl. With the dough hook attachment on low speed, mix in half of the flour until the dough is rough and shaggy.
- Add the remaining flour a little at a time until the dough no longer feels sticky (you may not need the full 4 cups). Add both cheeses, minced garlic, and the fresh herbs. Knead on medium speed for 10 minutes until smooth and slightly tacky.
- First Proof: Lightly coat the bowl and dough with oil. Cover with a damp cloth and let it rise in a warm spot for 1 hour, or until doubled in size.
- Shape: Deflate the dough and place it onto a clean, un-floured surface. Divide equally into 12 pieces. Cup your hand over each portion and roll into a tight, smooth ball. Place the rolls onto a parchment-lined baking sheet or a 9x13 baking pan.
- Second Proof: Cover the rolls with a towel and let them proof for 30 minutes until puffy. While they proof, preheat your oven to 350°F.
- Bake: Whisk the egg and 1 tablespoon of water together. Brush the puffed rolls with the egg wash and top with a generous handful of additional cheese. Bake at 350°F for 25 to 30 minutes.
- Remove from the oven, garnish with fresh chopped parsley. Enjoy!
Notes
- The Windowpane Test: To check if your dough has been kneaded enough, tear off a small piece from the bowl. Using both hands, gently stretch the dough from the center. If you can stretch it thin enough to see light through it without it tearing, it is ready! If it breaks easily, just keep kneading for another minute or two.
- The Spring-Back Test: After the second 30-minute proof, your rolls should look nicely puffy. Gently press the side of one roll with your finger. If the indentation springs back slowly and leaves a slight dimple, they are ready for the oven. If it snaps back instantly, they need a few more minutes to rise.

Jan says
Made ham sliders with these and everyone said they were the best sliders ever! Will be making them again!
Simply Scratch Made says
Great to hear they were a hit! Thanks for the review.