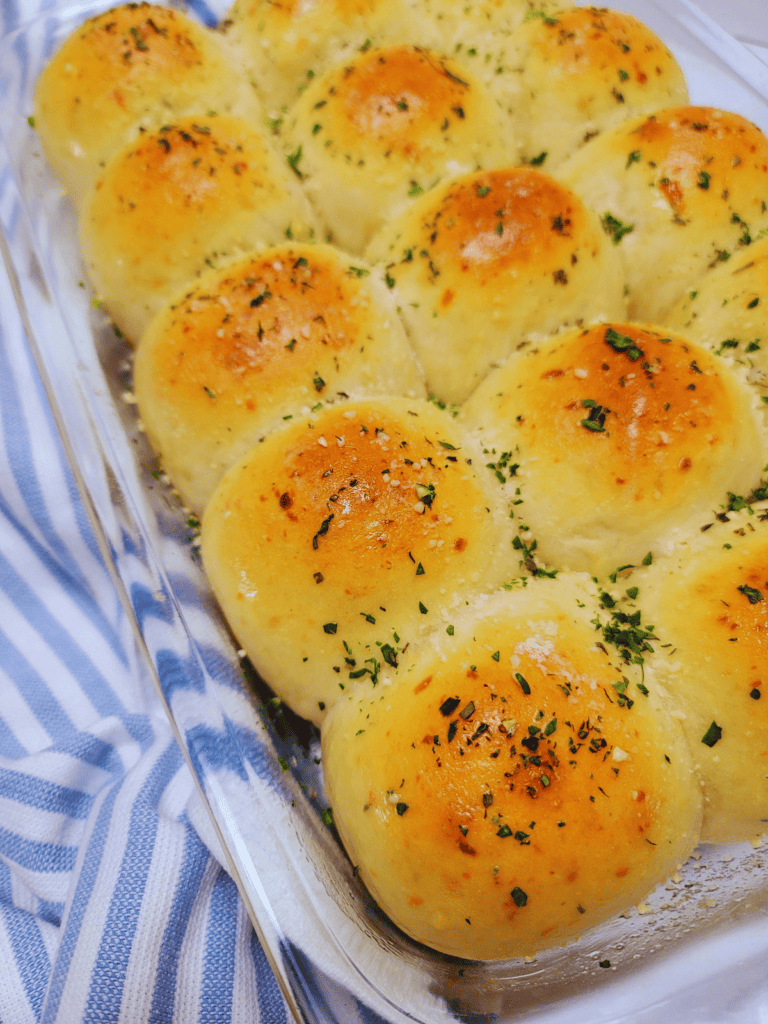
Buttery, soft and fluffy dinner rolls packed full of garlic herb flavor! These Garlic Herb Rolls are so easy to make and perfect for any occasion. They are make-ahead and freezer friendly!

I absolutely love making these garlic herb rolls to go alongside pasta dishes. They are also great as slider buns. My family loves them just as much as I do. I could probably serve them every night without any complaints. They are that good! I mean what’s not to like about a soft and fluffy roll full of garlic, herbs and cheese, that is brushed with a delicious garlic herb butter?
Y’all when I say these rolls are soft, they are super soft. The dough is enriched with mozzarella and parmesan cheese which melts and makes these dinner rolls so soft and dreamy. I really hope you love these rolls as much as my family does!
More Bread Recipes
How to Make Garlic Herb Rolls
My preferred method for kneading dough for dinner rolls is using a stand mixer with a dough hook attachment, as it simplifies the process. The dough hook takes over the task, making it less labor-intensive. While kneading by hand is certainly possible, it requires more effort and time.
- In the bowl of a mixer with the dough hook attachment combine the warm water, milk and butter. Add in the yeast. Let set for 5 minutes to bloom the yeast.
- Add in the honey and salt. Mix until well combined.
- Begin adding in half of flour while the mixer is on low. The dough will be rough and shaggy at this point.
- Add the remaining flour as needed until the dough no longer feels sticky. Not all of the flour may be needed.
- Now add in both cheeses, minced garlic and the fresh herbs for the dough.
- Knead for 10 minutes or until the dough becomes smooth and slightly tacky.
- Cover the bowl and dough lightly with oil, cover with a damp cloth and place in a warm place until doubled in size.
- Deflate the dough and place on an un-floured work surface. Using a scale, portion the dough into 12 equal portions.
- Using a cupped hand, roll the dough balls into round rolls.
- Place on a parchment lined sheet tray or a parchment lined 9×13 baking dish.
- Cover with a towel and allow to proof for 30 minutes or until puffy.
- Brush with eggwash and bake in a 350 ° F for 20-25 minutes.
- Once the rolls are out of the oven, brush them with the butter. Now sprinkle on the parmesan herb mixture. Enjoy!

How to Tell When the Dough has Been Kneaded Enough
Take a small piece from the large ball of dough. Using both hands, carefully stretch the dough until the center becomes thin enough to be translucent. If you can see through the dough without it tearing, it has been sufficiently kneaded—this is known as the windowpane test. Should it tear or break easily, continue to knead the dough for a longer period.

Storing Garlic Herb Rolls
Store in an airtight container in the refrigerator for up to 5 days. To reheat, wrap in foil and place in a 300° F oven for 10 to 15 minutes, or until warmed through.
How to Tell When the Rolls are Fully Proofed
After 30 minutes, the rolls should appear nicely puffed up. To test if they’re ready for baking, gently press one of the rolls. If the indentation springs back swiftly, the rolls are set to bake. Should the indentation slowly spring back, allow the rolls to proof for a bit more time.
Freezing Garlic Herb Rolls
To freeze unbaked dinner rolls, arrange the portioned and shaped rolls on a parchment-lined baking sheet, ensuring they are not touching. Freeze for several hours, then transfer to a freezer bag or airtight container, separating the layers with parchment paper.
When ready to bake, remove the rolls from the freezer bag or container and place them on a parchment-lined baking sheet or a 9×13 inch baking dish lined with parchment. Cover and let thaw completely. After thawing, allow the rolls to proof until they have doubled in size, then proceed with the baking instructions.
Handpicked Recipes
Tried This Recipe?
Leave a review below, I would love to hear how it turned out! ⭐⭐⭐⭐⭐
FOLLOW ME on Facebook, Pinterest, Instagram and YouTube to stay connected!
Garlic Herb Rolls
Soft, fluffy and made from scratch. These easy garlic herb rolls are perfect for any holiday dinner or just your average weeknight dinner.

Ingredients
Dough
Topping
Instructions
-
In a small pan on the stove combine the water, milk and butter. Heat on low until the butter has melted. Pour into the bowl of a mixer. Allow to cool to lukewarm before adding the yeast.
-
In the bowl of a mixer with the dough hook attachment combine the warm water, milk and butter. Add in the yeast. Let set for 5 minutes to bloom the yeast.
-
Add in the honey and salt. Mix until well combined. Begin adding in half of flour while the mixer is on low. The dough will be rough and shaggy at this point.
-
Add the remaining flour as needed until the dough no longer feels sticky. Not all of the flour may be needed.
-
Now add in both cheeses, minced garlic and the fresh herbs for the dough. Knead for 10 minutes or until the dough becomes smooth and slightly tacky. It should pass the windowpane test at this point.
-
Cover the bowl and dough lightly with oil, cover with a damp cloth and place in a warm place until doubled in size.
-
Deflate the dough and place on an un-floured work surface. Using a scale, portion the dough into 12 equal portions.
-
Using a cupped hand, roll the dough balls into round rolls. Place on a parchment lined sheet tray or a parchment lined 9x13 baking dish.
-
Cover with a towel, place in a warm place and allow the rolls to proof for 30 minutes or until puffy. Preheat an oven to 350° F while the rolls are proofing.
-
Once the rolls have puffed up brush with eggwash and bake for 20-25 minutes.
-
Mix together the melted butter, salt and garlic powder. Once the rolls come out of the oven, brush them with the butter and sprinkle on the herbs and parmesan cheese. Enjoy!


Made ham sliders with these and everyone said they were the best sliders ever! Will be making them again!
Great to hear they were a hit! Thanks for the review.